CLICK HERE FOR THOUSANDS OF FREE BLOGGER TEMPLATES »

Sunday, November 2, 2008

Old Fashioned 'Fuzzy' Crystal Bulbs

Anyone remember the old Christmas lights that were round, big and crystal looking? Well, we are going to make some in PSP! Be sure to Save Often AND save in psp form for later use.


Old Fashioned "Fuzzy" Crystal Bulbs
by MentalNotez
Written in PSP9 but can be replicated in any version.


Open a transparent canvas in your PSP. Make it large enough to have a comfortable work space. Mine will be 500x500. The filters/plugins that I used were: Fantastic Machines: Paint Engine (http://fantasticmachines.com/store/index.php?cPath=24&osCsid=ffe54b8b7a2b13539a4967f9167fa45f) and Eye Candy5: Glass. I think you could substitute if you don't have those filters. Just play around and see what you come up with and like.
Select your selection tool, set to circle, feather of 10 and make sure that anti-alias is checked!


Choose any color for a flood fill that you want, or a gradient, maybe even a pattern. Now, draw out a 'bulb' and flood fill it. Then, go to your Fantastic Machines: Paint Engine and use these settings:


Then, go to your Eye Candy and use your favorite Glass setting. Now, repeat with Fantastic Machines. Now, go to Adjust, Sharpen, Sharpen More. Repeat. That is it! Save as a Tube.

Hope you have fun and remember, a Tutorial can sometimes be just an inspiration!! Do it your own way!

If you have any questions, contact me at: MentalNotez@gmail.com I would love to see what you make!


Sunday, July 27, 2008

Paper Abstract Elements Tutorial By Christy

Supplies Needed:
Shape of Choice
Texture ( must have some detail)
Virtual Painter Plugin
Start by opening PSP and a New Transparent image (I use Size 500x500) Select the shape you wish to use, line width 5 is what I use, you can make the line width larger if you want, foreground color black, back ground color null. Draw your shape out in the image, however large you wish it to be. Example:


Now click on the magic wand tool, and click on the inside of your shape.you should now have ants inside your shape. go to selections modify, expand and expand by 1. Go to layers, add a new layer. Now go to your color palette and click on the background color and select pattern, and find the pattern/texture you wish to use. Click on the flood fill tool, and flood fill your shape with the texture/pattern you picked. Go to selections, and select none. Now move that layer under the layer first layer. This is now what you should have. Except with your own shape and texture/pattern:


Go to Effects, Plugins, Virtual Painter, Collage. Here, click on preview and see what it looks like and play with the settings to get a look you like. Here is what the controls look like You will have to hit preview to see what your image looks like with the collage effect.


When done, merge all visible and you have now made a abstract paper element. If you want to have more in other colors just duplicate the collage layer and colorize that layer.


Example of finished product:


Hope you have enjoyed this tutorial.As with all ABCDesignz tutorials, no distribution of this tutorial allowed. Please send your friends to this blog link only, and inform them of what tutorial name to look for.

Tuesday, July 15, 2008

Making a Glass Locket/Piece


Above is what we will be making. I know it looks all jaggedy and plain but, it's not rough around the edges nor will it be plain. :O) We will be using EyeCandy 4000. This is written using PSP9 but can easily be done in other version or programs!


Let's get started....


Making a Glass Locket/Piece
by MentalNotez


Open your psp, a transparent working space. I use 500x500 but, you can use what you are comfortable with. Add a layer! Now on the second layer you just created, we will start. Using your selection tool, circle, make sure the anti-alias IS checked!! Draw a circle the size you want. Flood with white, go to selections, modify, contract. You are making your chromed edge so, pick a contraction number that looks good to you. I used 10. Hit ok. Now DON'T deselect! Hit delete. You should have a transparent middle on your circle now. Hit selections, select none. Now, go to effects, Eye Candy 4000, Chrome and select: Outdoor: Bevel Width: 45, Bevel Hight:50, Scale: 50, Smoothness: 50, Ripple Width:300...should be the default settings and it should look like below, if not, play with it till you get the effect you like.


Now, using your magic wand, make sure that the Anti-Alias IS checked, select the middle, go to selections, modify, expand and expand by about 2-4. Add a layer. Now, go to effects, EyeCandy4, cut out...Make your selection transparent...play with the blur settings till you get a nice blur/darkened edge that you like. I used: Distance: 17.75, Blur 42, Opacity 80. Now, go to Eyecandy again, this time to Glass. Use a white colored glass and adjust your bevel width till you get a nice 'white' highlite near the edge somewhat. My bevel width was: 24.52. You can use a different color on your glass color if you would like to make a colored piece of glass. Play around with the settings. Do NOT deselect. You should have something like this:

Now, that first part is done. You can add a ring to it by using the same steps but stop after you chrome. You wouldn't need to use the cut out or glass. You can add goodies to the inside at this point and that is why I said do NOT deselect. If you are done, you can stop here. If you want to add a little something to your piece, continue with the Tut.
Add a new layer and put it below the current one, so that it is on the bottom but above layer 1. You can copy and paste something in there, you can paintbrush something in there, you can do what ever you like! I am going to Paint Brush and use another effect, Xenofex2-Constellation. Once I use that, I can sharpen and sharpen more to get a neat sparkly/glittery effect! You can also use embellishments to decorate...bows, flowers, sparkels, whatever you like. This is what I did with mine:


Wednesday, July 2, 2008

Rudy The Red Nosed Fly


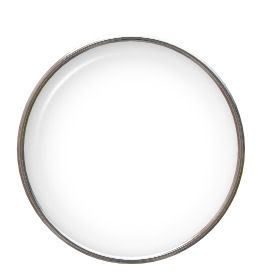
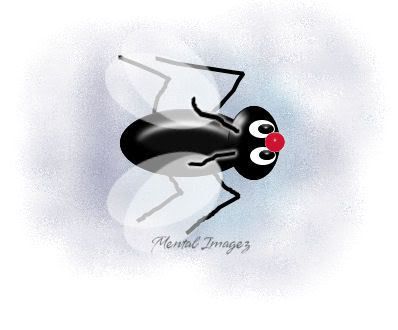
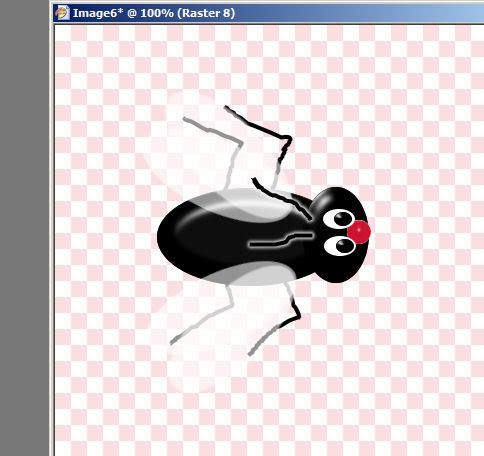
Hi and welcome to ABCDesignz first Tutorial! Above is Rudy, he is what we will be making. Please bare with me as I am totally new to this!
I started out to write a tut that used one of our scrap kits from our Scrap Blog site: http://abcdesignz.blogspot.com/ but somehow, Rudy appeared on the page. I hope you have fun with this tut. Please email me with any questions at: MentalNotez@aol.com
This tut was written in PSP 9 but, I am sure it can be adapted to any program. The only program I used for effects was the Eyecandy4 glass effect. Let's get started.

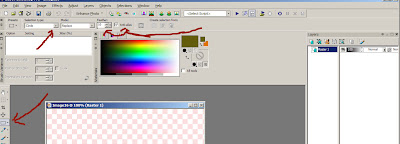
Open a transparent image, sized to your liking but, I used 500x500. We will be working with layers and as always, be sure to save often!!
Using your selection tool, elipse, anti-alias checked, draw Rudy's body and flood fill with black, like so:


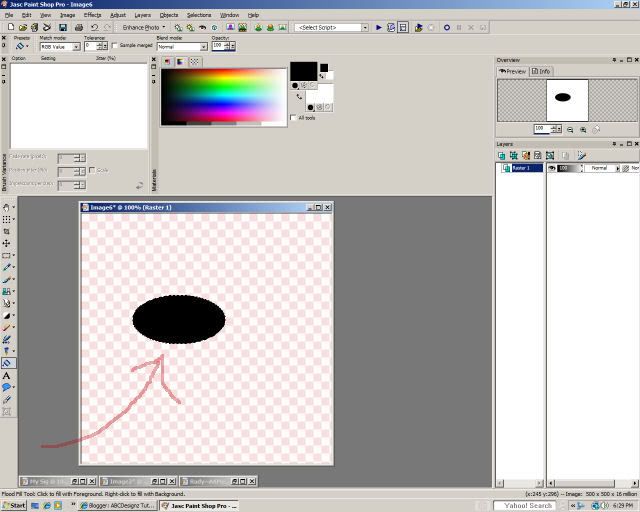
Your image will not be jaggedy, this is from resizing. You can rename your layer if it helps you to keep things straight: Body

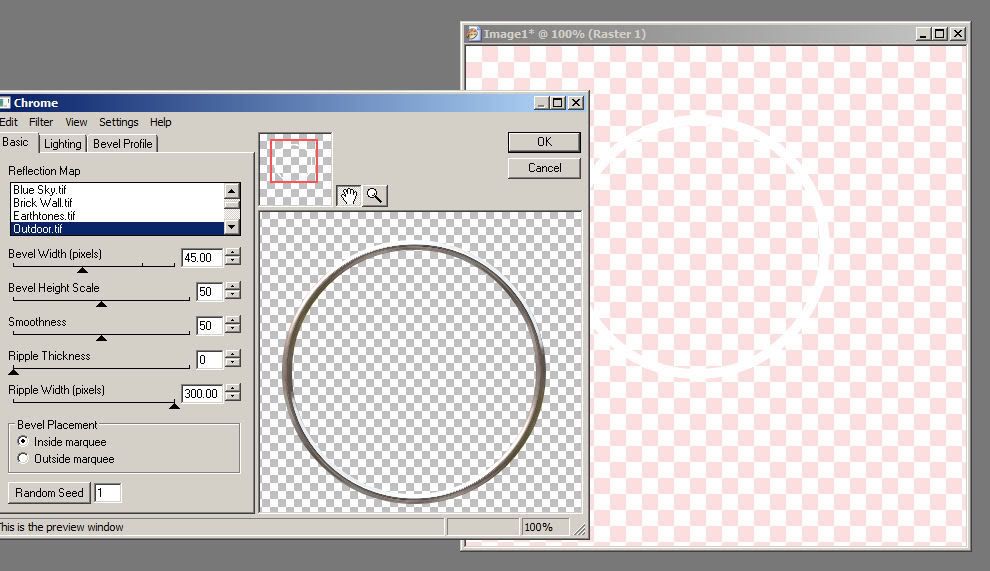
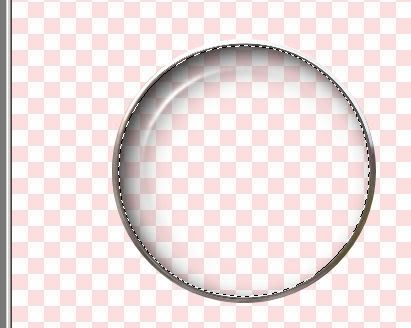
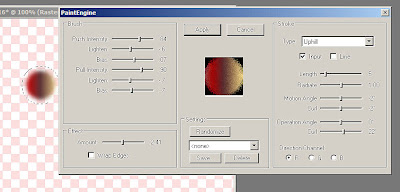
Now, we are going to give Rudy some depth. Go to effects, choose Eyecandy4's glass effect, color black, go to the settings tab and choose Opaque Red. Make sure you change the color of the glass to black. Selections, select none.

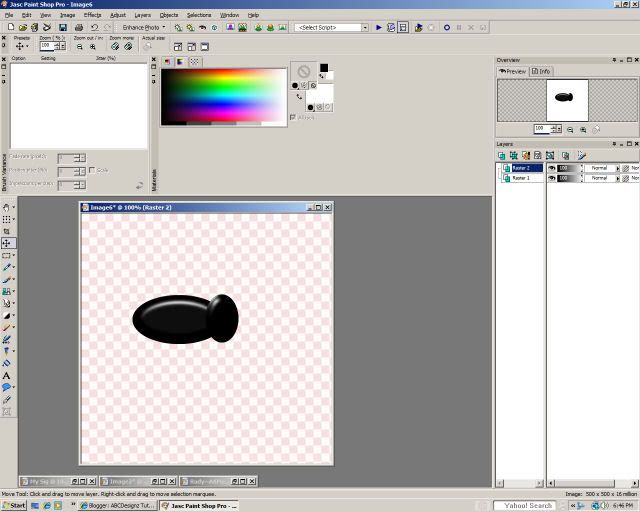
Add a layer, rename it: Head Grab your selection tube and we are going to draw Rudy's head. Once you get it how you like, apply the same glass effect, deselect it and move it into position. You may have to move the lighting position around a bit as well. You should have something like this:


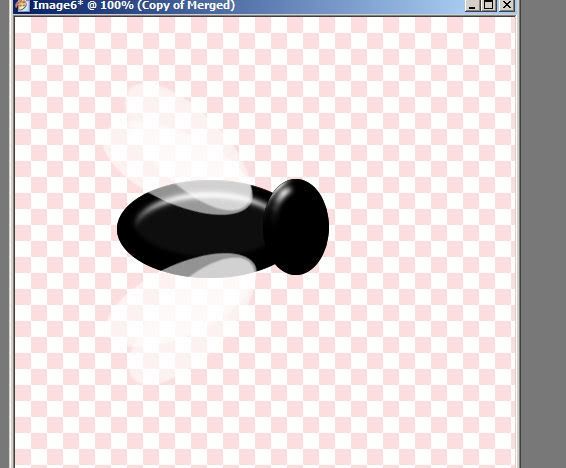
Add a new layer and rename it wings. Using the selection tool, draw an oval for the wing, drop the opacity down to about 58% or to your liking, deselect. Rotate the wing about 25 degrees to the right or to your liking. Duplicate so you have another wing, rotate this wing about 10 to 20 degrees to the right, position both wings on Rudy's body where you like them. Now, close off all layers EXCEPT the 2 wings, go to layers, merge visible. Duplicate once more, image flip and position these wings.


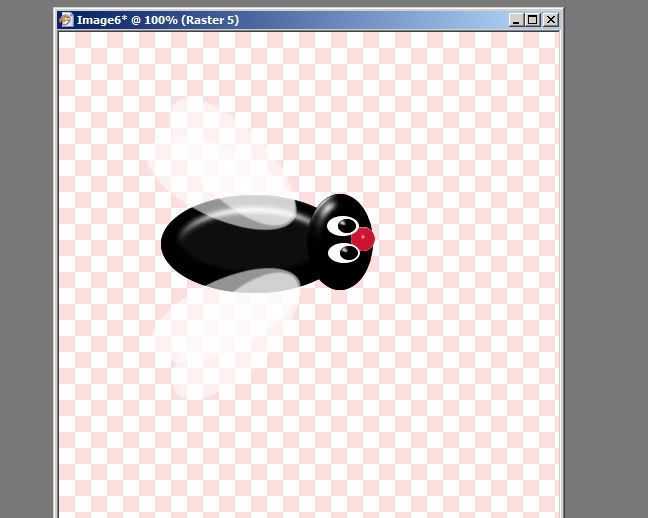
Now we will add the finishing touches. Add a layer. This will be his eyes. Again, use your selection tool, elipse and make his eyes. Flood fill with white and position on his head to your liking. Add another layer. Using the elipse tool, make smaller ovals and flood with black. These are his pupils. On the pupils, apply the same glass effect. Now, draw a nose but this time, leave the glass color to the original red. You should have something like this:

Now, go to the bottom layer, use your pen tool, you may need to add a layer and move it to the bottom. Draw some legs and a set of antena. I put a corona on my antena just for effect.


Now save Rudy as a Tube and use him however you like. :O) This tut can be used to make all kinds of things...catapillars, ants, snowmen...just play and have fun!! I hope you enjoyed making Rudy.


A Bit Behind

Hello Everyone...
Due to illness, I am running a little behind in getting some Tutorials posted for you. I do promise that I will have some up for you real soon!
My plan is to give you tips and tricks with very easy to follow instructions. I just hope I can figure out how to do that! LOL
Back to work now and I will see you real soon!

MentalNotez

Wednesday, June 25, 2008

*Waves Frantically*

Hi Everyone!
I am Mental and I am honored to be part of the ABCDesignz creative team! We hope to bring you some new and exciting things in all our creative endeavors! I will be writing our first Tutorial this weekend and hope to have it up by Sunday evening. I will be using one of our scrapkits from: http://abcdesignz.blogspot.com/ so, be sure to head over there to see what we have. Plenty of freebies to go along with our purchase kits!
Till next time...
God Bless and Keep You!
Mental

Wednesday, June 18, 2008

Welcome From Becca!

Hello, everyone! Welcome to our new blog, where we will share tutorials written by us, using our own items that we created which are featured on our first blog, http://abcdesignz.blogspot.com

Tutorials will be written Annette aka Mental, Becca (me), Christy and Denise. Please be patient, as this is a very new venture for us, and it'll take some time to get things together.

Happy Scrapping,
Becca